

NICE CHRISTMAS, BUT WHAT LITTLE SURPRISES!
2023-12-15 Eco Silver PaperHygiene
Do you get out of bed on the morning of 16 August and already have the urge to make a Christmas tree running through your veins? Don’t worry, it’s all normal now, you’re not alone… on the contrary! The wait is over though, that magical time of year has finally arrived. Your enthusiasm is sky-high, your hands are ready, but here’s the problem: you are interrupted by a thousand damn layers of dust covering the tree and its decorations, abandoned for many months in the garage in a box recycled from the appliance on duty. Inevitably all that dust causes the tree and decorations to become a veritable breeding ground for dangerous germs and bacteria that cannot be ignored.
There’s no shortcut or magic unfortunately… everything has to be cleaned properly before you put it together! Today, however, we are here precisely to give you two tips on how to speed up the cleaning process but at the same time do it precisely and effectively.
CHRISTMAS STEP 1…
First of all, before you take out the tree, lay out an old sheet to prepare your work surface. This is to make sure you don’t dirty the floor underneath, which otherwise needs to be cleaned and would end up consuming the same calories as a marathon. That said, put on your gloves and mask and let the cleaning begin!

CHRISTMAS STEP 2…
If the tree splits into several parts, seal each part in a plastic bag with 400 grams of salt and then shake it vigorously like a bartender with his shaker on a Saturday night. In this way, the ‘coarse’ dirt will be washed away.
Alternatively, if you are a lazybones, in order not to dismantle the tree into pieces, clean each part from top to bottom so that the dust on top falls to the bottom and you do not have to clean the previously cleaned areas. To avoid contamination of the floor, always place something around the tree to collect the falling dust, such as newspaper sheets, or the sheet we recommended at the beginning of our article.
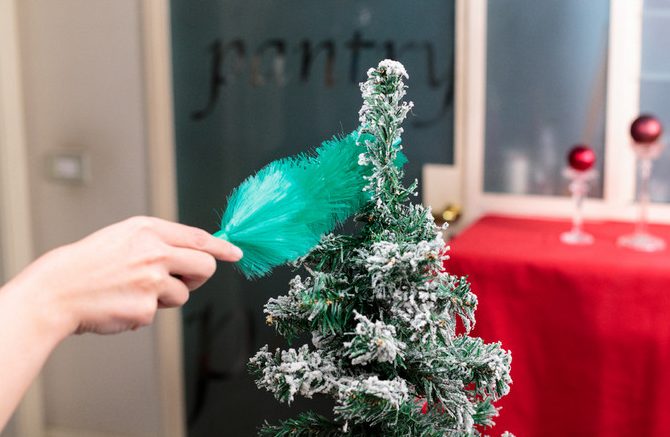
NOTE: Since the tree is circular, you might get confused and miss a few corners, so you can tie a coloured ribbon to the first branch and proceed in a circle until you meet it again. For dusting you can use a classic feather duster or a dust cloth that can wrap around the different branches.
You can also clean it with a hoover but you have to proceed with utmost caution and minimum power, you understand Verstappen right?
CHRISTMAS STEP 3…
If the most classic dusting isn’t enough for you, then read on for this next section, which is really for the cleaning perfectionist. You can wipe the branches with a cloth, or even a simple sponge, dampened with a mixture of lukewarm water and very little mild detergent or alternatively a dash of vinegar. It goes without saying that it must be perfectly dry before decorating or storing it. However, it is always good to test a hidden spot to see if it can be cleaned in this way without ruining it.
However, before cleaning the synthetic Christmas tree, always consult the instructions, see what material it is made of, also to avoid potentially toxic inhalation, and do a test run to check that the chosen methods and products will not damage it.
For absolute perfectionists, a can of compressed air can also be used, which, by means of the small tube that directs the emission of air, allows you to act on smaller parts of the tree and thus go deeper into cleaning.
AND FINALLY…
What about next year? A useful tip is to store the tree in a special plastic bag, with an airtight seal, once it has been used, in order to avoid or at least limit the accumulation of dirt. In this way, your tree will certainly last longer and always look perfect.
I hope these tips have served you well and helped you realise how important cleaning the tree and its decorations is. Don’t play dumb, I know you already feel tired before you start but Santa sees what’s flowing on the branches of that tree, and he might decide not to leave his presents under a microbial pile…
U. G.

LATEST COMMENTS